Modify TDC Settings
When using the CAEN TDC DAQ electronics, the TDC settings can be modified/seen/saved by selecting the tab TDC Settings to be active.
A complete description of how to setup the TDC electronics is given in the following document:
MuSR Electronics: TDC
Modify Settings:
By pressing the button Modify Settings, you have the possibility to modify the setup of the TDC used for the experiment (and saved in the ODB – online database). Each setup configuration is saved on a so-called setup file located on the back-end computer. These setup files are maintained by the Instrument Scientist.
A setup file contains all the necessary logic as well as the histogram grouping and information on the t_0 and First Good Bins.
Note that the setup files do NOT contain information on the resolution and time-window, which should be selected on the fly when changing the settings.
A Wizard-Tab will lead the user through the setup configuration.
On the first wizard-tab, a drop-down menu will present the available setup files for the instrument.
Hopefully the names should be self-explanatory.
If you have the impression that a setup file is "screwed-up" you can always download its "master" copy which has the extension .v1190_template and which are listed at the end of the drop-down menu.
Such "master"copies cannot be overwritten by usual users.

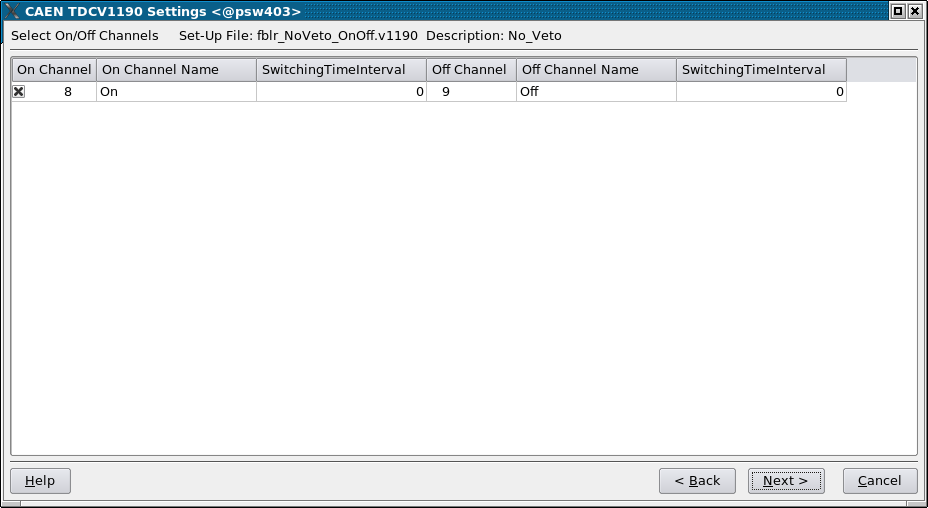
The next wizard will appear only if an ON/OFF (Red/Green) mode has been defined in the setup file of the TDC electronics. This wizard will display the ON and OFF channels as defined in the choosen setup file.
Do NOT change these setting unless you know what you are doing....
For example, on the figure, one sees that the channel #8 is the ON channel and that the channel #9 is the OFF one.
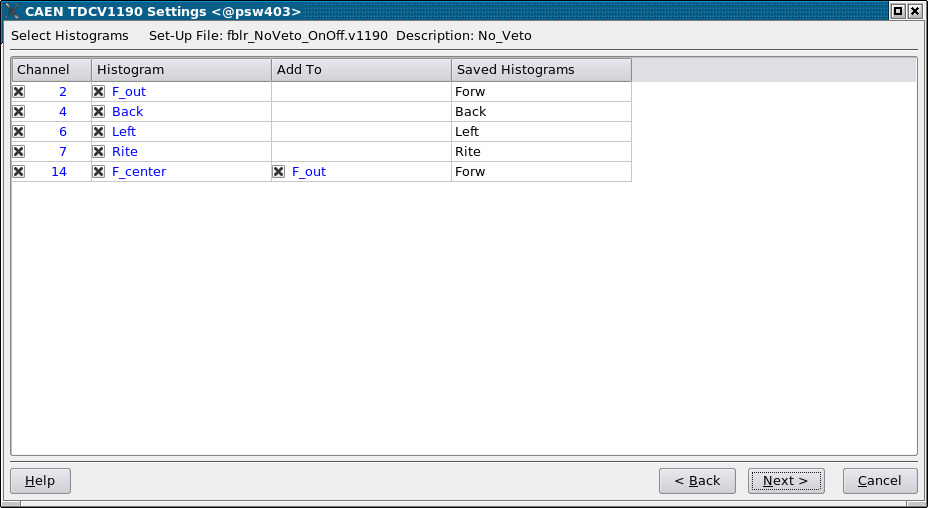
On the next wizard-tab, you will have a list of the seleted histograms.
The first column indicates the channel number of the TDC, the second shows the internal histogram names of these histograms, the third column signals whether one of these histograms is added to another one. Finally the last colums reports the names of the saved histograms.
Do NOT change these setting unless you know what you are doing....
For example, on the figure, one sees that the channel #9 is stored internally on the histogram "R_ext", and that it is added to the internal histogram "R_int" to finally be saved under the name "Rite" of the data-file.
The next wizard-tab is normally the only wizard-tab which will require some inputs from your side:
- you can choose the format of the output file (so far only PSIBIN format available...).
- you can choose the bin resolution of the saved histograms (multiple of 0.1953125 ns/channel which is the base resolution of the TDC). Remember that for the usual MuSR instruments (at the moment GPD, GPS and LTF) a resolution lower than 3 (i.e. 3 x 0.1953125 = 0.5859375 ns) does not make any sense as the detectors have intrisically a worse resolution.
- the third input is the length of the data-window. It can be entered in bin units (remember that the bin unit is choosen above), in TDC units (i.e. in multiple of 0.1953125 ns) or more easily in microseconds. When an input with given units is performed, the corresponding values on the other units are calculated.
Usually, only data-window of 10 or 5 microseconds are used. - The next input defines the pileup-window with respect to the data-window.
Do NOT change this setting unless you know what you are doing....
- The final setting defines the Last Good Bin with respect to the data-window.
It is strongly adviced to leave this setting ON as the Last Good Bin will be automatically calculated. - A dialog box containing information about the total number of bins may appear when going toward the 4th wizard-tab.

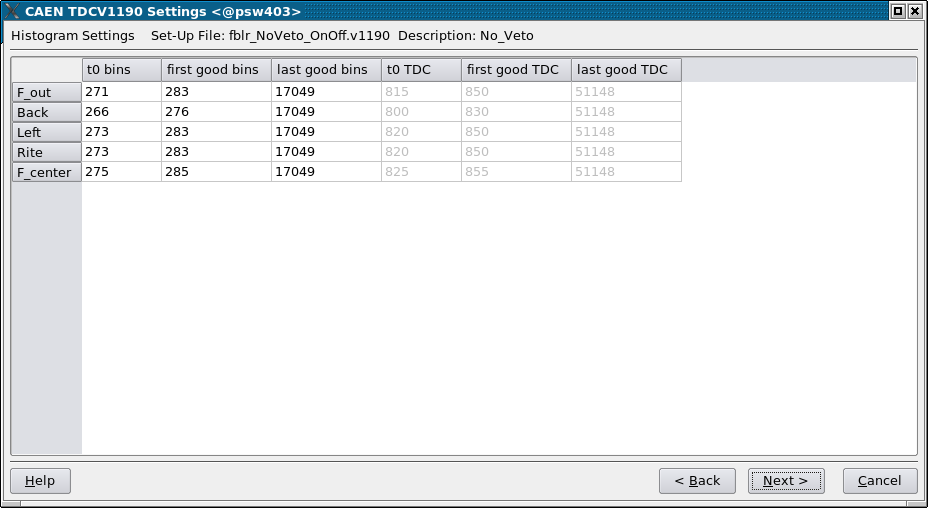
On the next wizard-tab, the time-zero, first good bin and last good bin of the histograms can be set.
- The values can be given either in 'bin units' (resolution depending of the choosen binning) or in 'TDC units' (representing 0.1953125 ns/channel – light grey columns).
- Usually these values do not need to be changed as the time-zero, first good bin values are rather fixed in TDC units and the last good bin will usually automatically depend on the time-window slected on the previous wizard-tab.
- Note that when attempting to change the TDC settings when a run is active, these options are the only one which can be modified.
Apply, the modified settings are written to the online database ODB.If necessary, the changes can finally be saved on a TDC setup file.
Remember that the time resolution and length of the data-window are NOT written on the setup file. Therefore it is not necessary to save the file if the only changes that you performed were on these parameters.
Look at the Settings:
By pressing the button Show Settings one can show the present settings used by the TDC. A short version is displayed, but an extensive list of the setting parameters can be reached by hitting the button More....
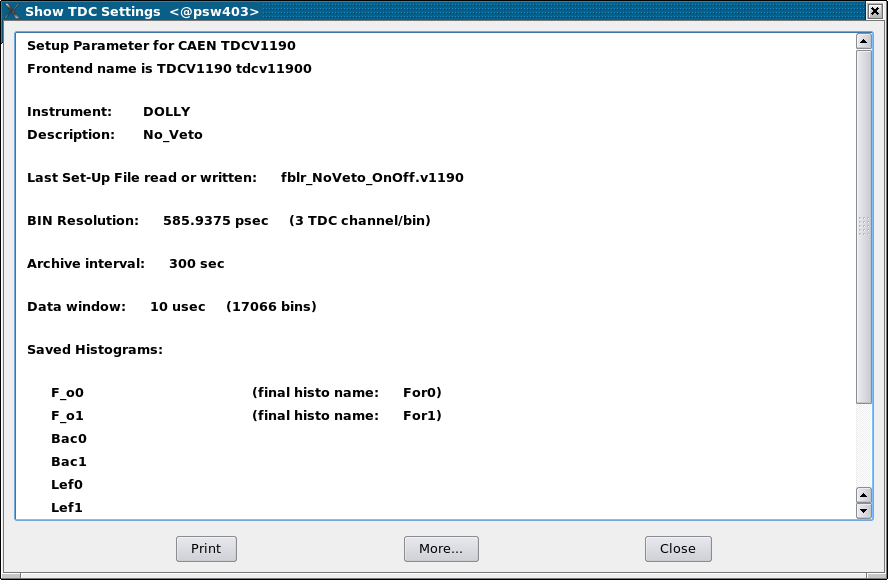
Show Settings option. More setttings are available with the More... button.Save the Settings:
The button Save Settings does what is says....